Programming Col Sig (proportions): Part 1 - Classical Student Test
This article demonstrates a scenario in which which we would need to script the formula for a Classical Student Test on a closed question. It shows the formula and gives two examples on how to program it with a few tips on how to refine the syntax and mirror settings in the pre-set col sig calculation.
The QES file and portfolio containing the examples discussed is attached: Table Arithmetic Examples 10.rar.
Why would we need to program column significance?
Imagine we program some simple table arithmetic e.g. multiply vertical % figures together from two tables to give a final % figure in our final table:
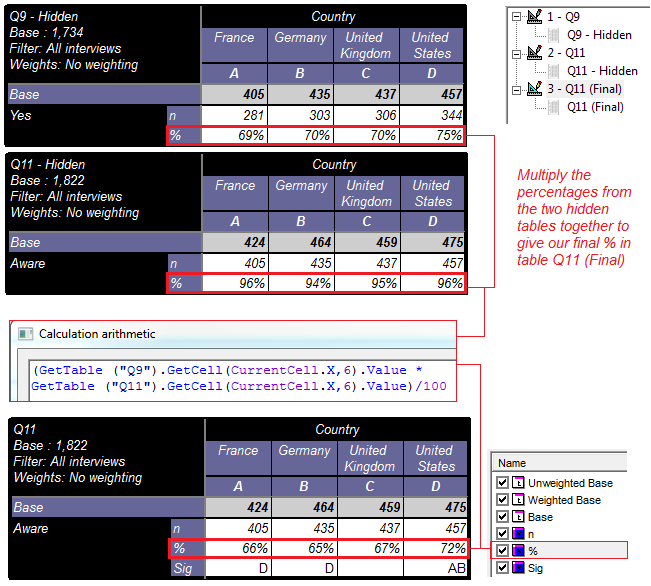
The % figure in our final table is no longer the pre-set ‘Percentage down’ calculation.

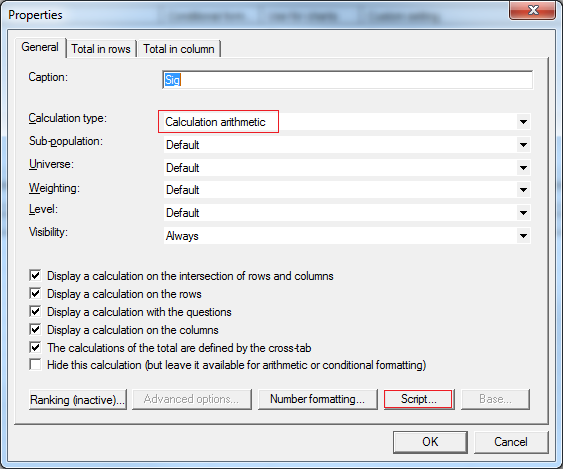
But instead is now ‘Calculation arithmetic’ in order to carry out the multiplication of figures.

This means that our usual pre-set ‘Column significativity on closed’ calculation will no longer be sufficient because it does not work with n or % figures derived in calculation arithmetic.

So in order to get col sig based on the figures we see in our final table, we need to create another ‘Calculation arithmetic’ and programme the sig formula in here:
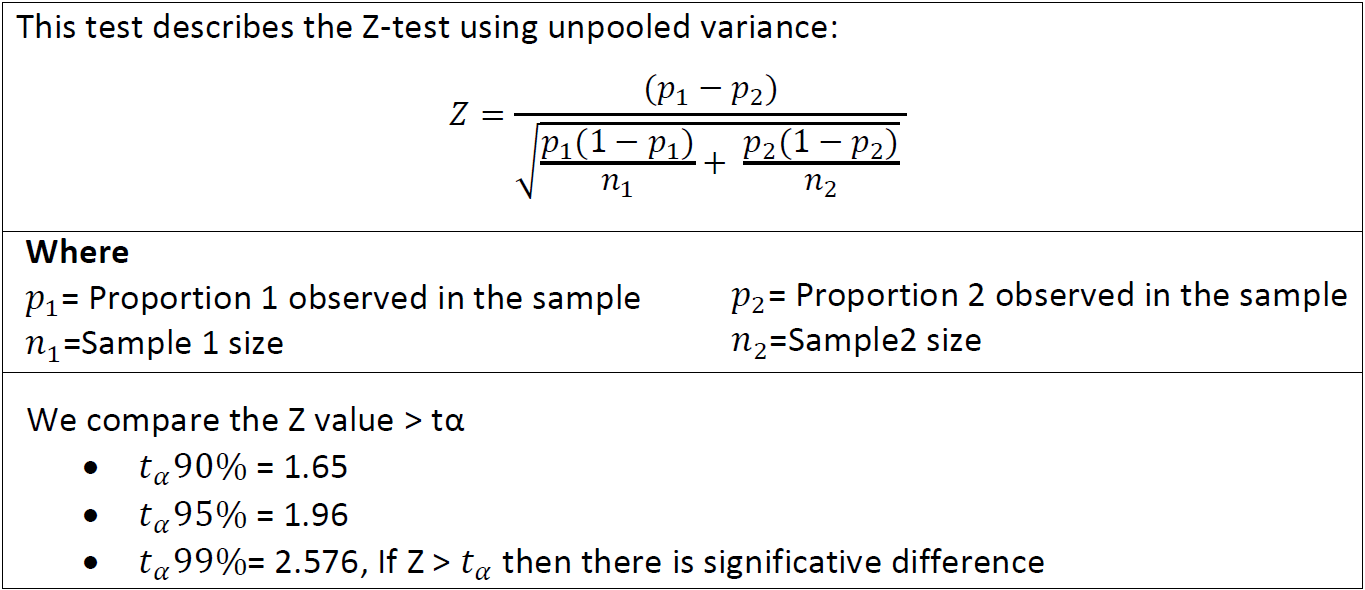
Before we start we need to know which sig formula we are programming. There are four different significance calculations that AskiaAnalyse carries out when comparing proportions:
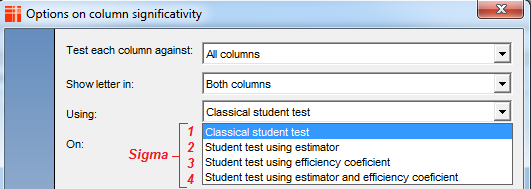
Formulas with efficiency coefficients are used when we have weighted data. In this example, we don’t have that, but we will look at programming col sig with weighting in the next articles on programming column significance.
Here we use: the Classical Student Test or Sigma1 as I will refer to it from now on.
As a bit of background, when we calculate col sig normally (pre-set calculation) we can get an output of the intermediary figures which result in the test (Sigma) values by setting the option below to ‘Yes’ in AskiaAnalyse:
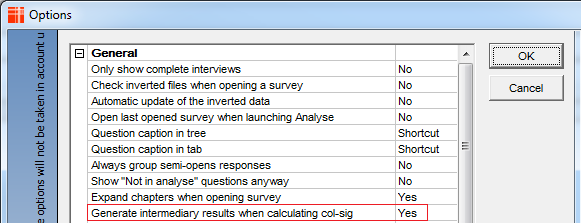
This is useful for checking the results you are getting with a manual col sig calculator or against a similar output from another software:
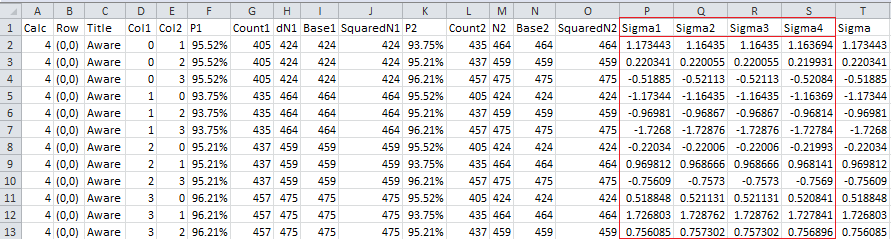
Now let’s proceed with looking at the formula & syntax to produce Sigma1:
The script to achieve this:
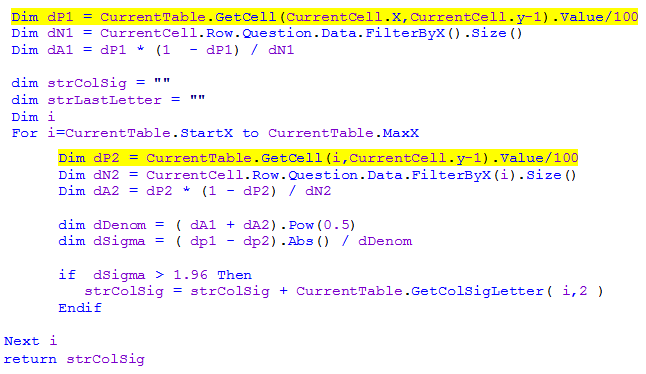
The parts of the syntax highlighted in yellow are those that reference the vertical % calculation we created by multiplying two previous %s together from separate tables.

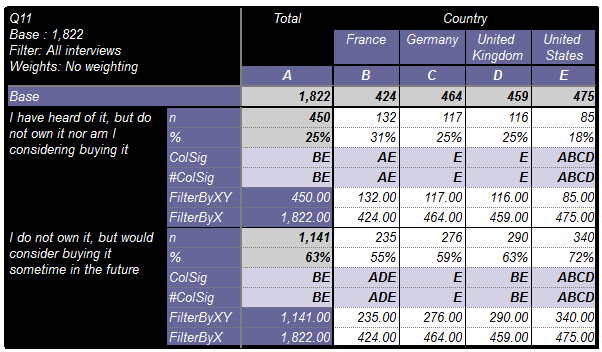
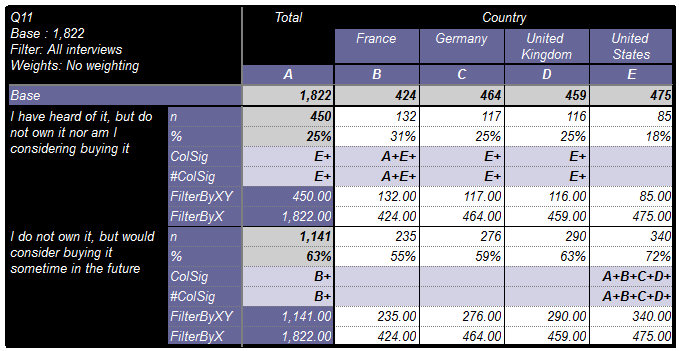
You can see how one would manually check these programmed significances in the attached Excel document (DebugColSig.xlsx).
Imagine you wanted to merely put the pre-set col sig output (col sig) side by side with the programmed col sig output (#Colsig) as a check. This is shown in the tab definition: Q11 - Sigma1 (replica)
The syntax in this case can be refined:
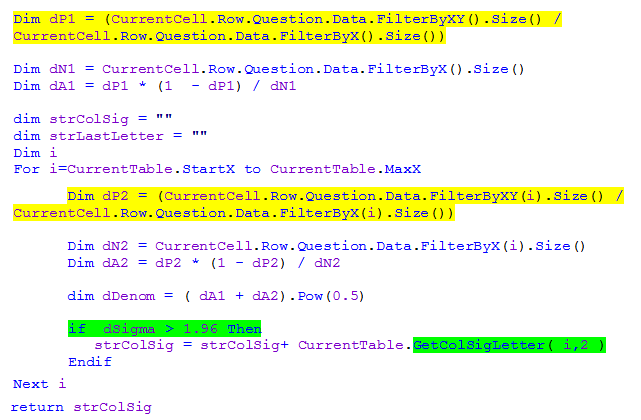
Instead of referencing the vertical % from another cell / calculation, we calculate it in the script using the ‘FilterBy’ keyword. This method is dynamic because doesn't rely on the position of the % calculation being fixed.
Finally, let’s take a look at how we can tweak the syntax to mirror some of the settings we can set in our pre-set col sig advanced options:

To mirror these settings we would change the part of the syntax highlighted in green to the below:

The result is in tab definition: Q11 - Sigma1 (replica 2).
Note the parameter for GetColsigLetter has been changed to 3 (99%) instead of 2 (95%). This is related to the strength (confidence interval) at which the test is done.
The strength (the default is 2) can be -3,-2,-1, 1, 2 ,3 to indicate the strength of the significativity.
The range of values this parameter can take (and return) are as follows:
- 1 returns a
- 2 returns A
- 3 returns A+
- -1 returns -a
- -2 returns -A
- -3 returns -A+
Programming Column Significance Part 2 & Part 3 will show the formulas and syntax for: Student Test using estimator & Student Test using efficiency coefficient respectively.