Scheduled AskiaTools batch exports
How to and best practices when setting up scheduled AskiaTools batch exports
You may have a requirement to create daily exports of your project data into a specific format (delimited ASCII/SPSS, etc.). This article will show you how to properly setup scheduled AskiaTools batch exports, as well as some best practice suggestions . . .
Disclaimer
This article is meant for Askia clients who manage their own hosting environments. If you are one of our clients who has purchased hosting through us, we would prefer not to set something like this up. One reason being: if all of our hosted clients set up scheduled batch exports, it would have a negative impact on our hosting centre's performance.
Pre-requisites
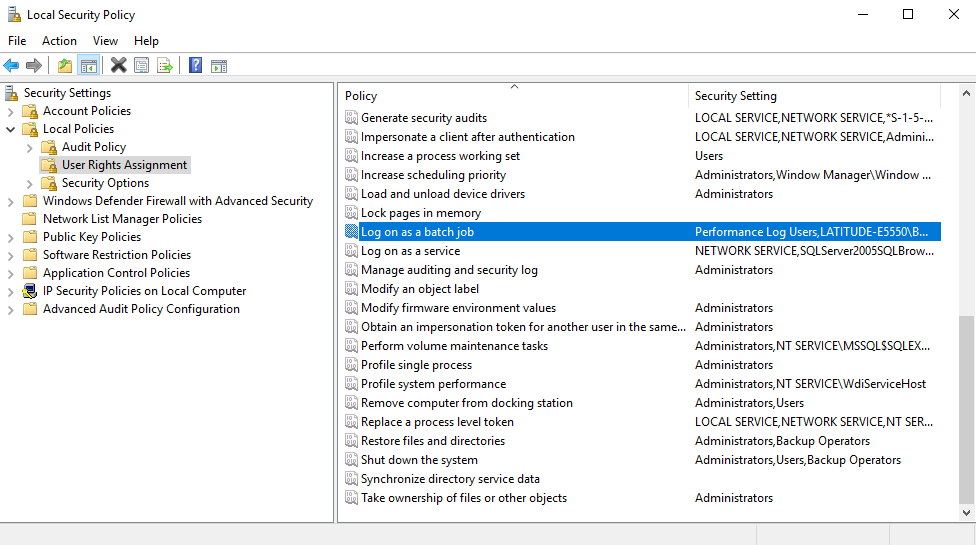
1: Make sure the Windows user account you're going to use to run the Scheduled Task has "Log on as a batch job" rights in the system's Local Security Policies:
https://technet.microsoft.com/en-us/library/cc957131.aspx
secpol.msc > Security Settings > Local Policies > User Rights Assignment > Log on as a batch job.
2: Make sure you have a secondary DATA partition/drive on your server.
As a best practice, try not to run your exports and store all of your exported data files on the same partition/drive Windows is installed to.
3: Make sure you have the latest Askia Suite installed on the server. http://installers.askia.com/helpdesk/askiasuite/
Note: it doesn't need to be activated with an Askia License; we're simply using it for the installation of AskiaTools in the default C:\Program Files (x86)\Askia directory - we're going to reference the AskiaToolsU.exe (5.3.3 thru 5.4.4) or Tools.exe (5.4.6+) application later in our batch files.
If you have any questions with any of the .bat commands used in the examples shown in this article, please reference the following:
If you have any questions with any of the AskiaTools commands used in the examples shown in this article, please reference the following:
Demo batch files can be downloaded here:
Note: the connection string details in the batch files have been redacted . . .
Step 1 (optional)

Create a separate "DATA" drive/partition on your server.
In my above example, I'm using a 30GB partition which is located on the same logical drive in my test system.
As a best-practice, you'll want to have this "DATA" drive to be a second physical, separate drive in your server.
Step 2 (optional)
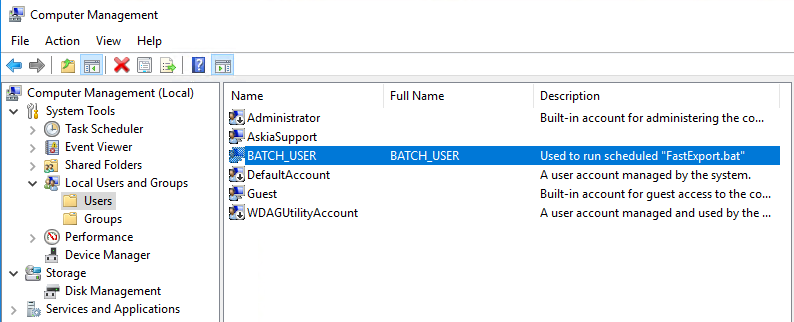
Create a local Windows user, which will only be used to run the Scheduled .bat Task.
In my above example, I called this user "BATCH_USER".
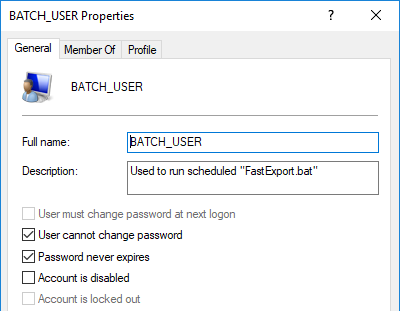
As this account will only be used to run the Scheduled Batch Export, I also set it so the user cannot change the password, and the password never expires. This user's credentials should not be shared or used to login to the Windows Server - they should only be used to run the Scheduled .bat Task.
Step 3
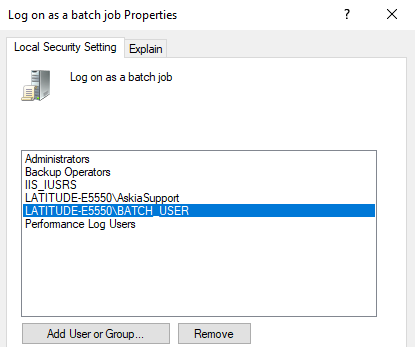
Grant this new "BATCH_USER" account "Log on as a batch job" rights.
Whichever account you used to setup your Scheduled .bat Task, it needs to have "Log on as batch job" rights, else the Scheduled Task will fail to run.
Step 4
Navigate to your DATA partition/drive, and create a root directory where all of your .bat and exported data files will be stored.
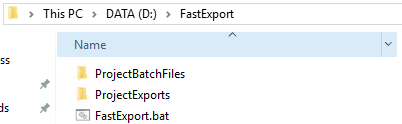
For the example I'm using in this article, I created a new "D:\FastExport" directory, which is where I'll house my main "FastExport.bat" file, as well as the two directories used to store the project-specific .bat files (ProjectBatchFiles), and the project-specific data exports (ProjectExports).
Step 5

Create your main "FastExport.bat" file in the root of your new "D:\FastExport" directory, like shown in the Step 4 screenshot.
This is the file that your Windows Task Scheduler event will be pointing to.
Essentially, as a best-practice, you want this to be the file that runs via the Windows Task Scheduler, which in-turn will reference other project-specific .bat files.
Important: as a best-practice, you should use the /WAIT command after each referenced project-specific .bat file. This ensures that each batch is run in order, one-after-another, rather than opening all referenced .bat exports at once, which could potentially cause a large amount of SQL, CPU, and/or Disk usage (your mileage may vary, as this depends greatly on many different project/export factors).
Step 6
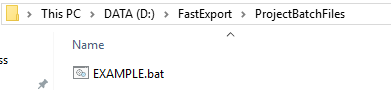
Create your project-specific "EXAMPLE.bat" file, which should be placed in a new "ProjectBatchFiles" folder inside of the "D:\FastExport" directory.
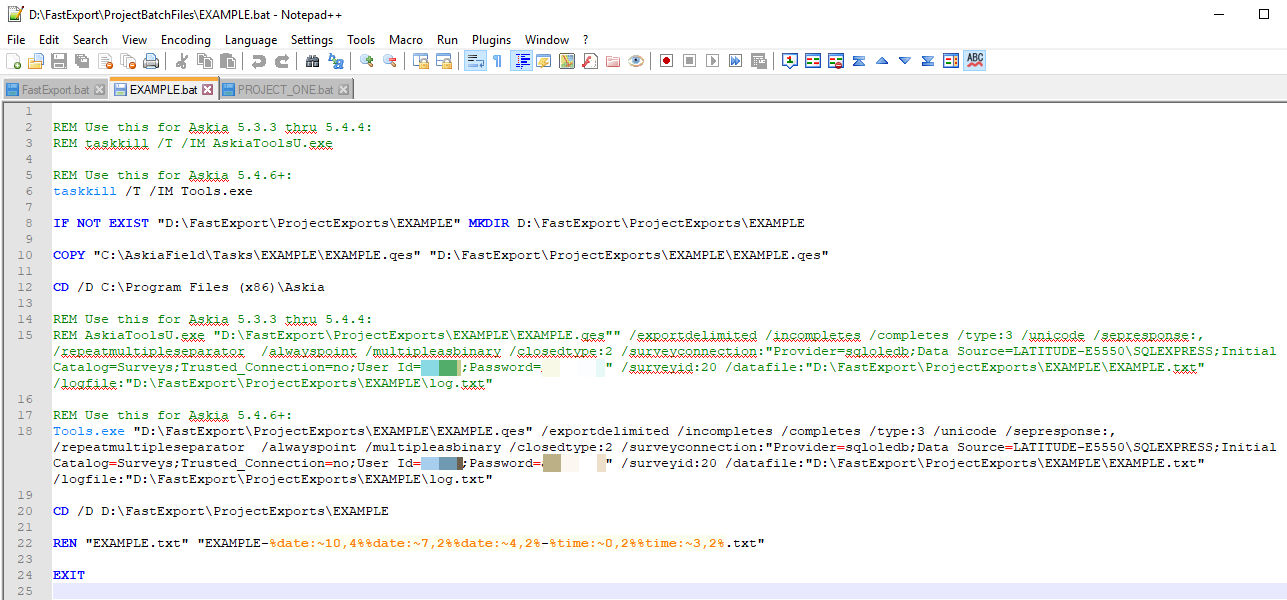
Below, I'll walk you through the eight different options used in this project-specific .bat:
1:
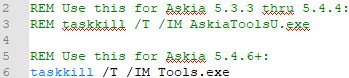
We add this line at the beginning of the .bat because we want to make sure all previous instances of AskiaToolsU.exe or Tools.exe are closed before a new export runs.
2:

Next, we check if this specific project's directory exists in our "ProjectExports" directory. If it does not, then we make it.
3:

Next, we're copying the QES from our project's working directory into our new directory.
4:

Next, we're going to point our command prompt to our Askia Suite installation directory.
5:

Now that our command prompt is pointed at our Suite installation directory, we can reference our "AskiaToolsU.exe" or "Tools.exe" applications.
Then we reference our newly copied QES file, and then go about the process of using whatever options desired for our Tools export (again, you can find all command line options for Tools here: https://support.askia.com/hc/en-us/articles/200003451-Command-line-in-Askiatools)
After I've specified my command line options, I also want to set the "/datafile" and "/logfile" options, which we'll use later.
6:

Next, we're going to change directories again, but this time we're going to point our command prompt at our new \ProjectExports\EXAMPLE\ directory.
7:

Now we want to take that "EXAMPLE.txt" datafile that was created and rename it to include a date and time.
An example of what the final delimited text file looks like is shown below:

In my example, I'm using YYYYMMDD format. If you want to use MMDDYYYY format, you could use the following:

Which outputs like this:

8:

Lastly, we're telling the command prompt window to exit and close without a prompt.
At this point, once this project-specific batch exits, the next referenced batch in our "FastExport.bat" file should start, and then the process repeats, only with a different project.
Now that the batch files are set up, we can move on to the next step . . .
Step 7
Now we need to create the actual Scheduled Task that will run our "FastExport.bat" file.
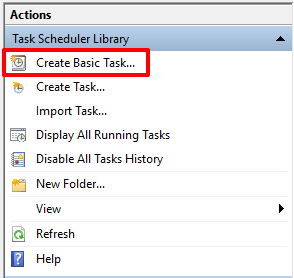
Open Windows Task Scheduler, and on the right-side of the window, click the "Create Basic Task..." button.
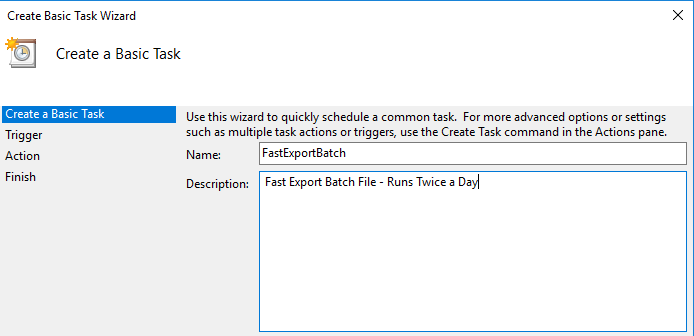
Name it whatever you'd like (in my case, I'll name it "FastExportBatch"), and then set up a description (optional) to remind yourself or anyone else in the future what this scheduled task is meant for.
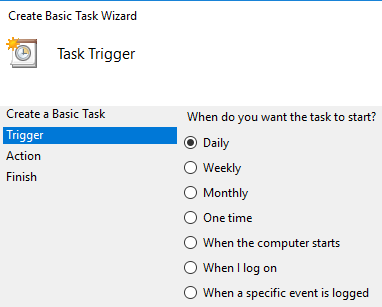
We're going to run this daily, so choose the "Daily" trigger.
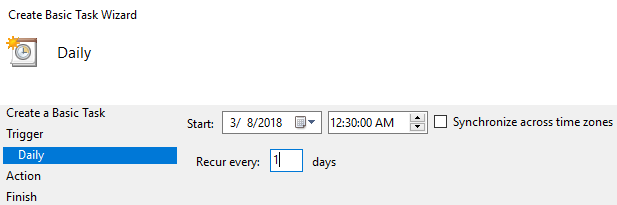
I want my batch to start @ 12:30:00 AM every day, and recur every 12 hours. Because we're still in the "Basic Task Wizard", we don't get the option to run it every 12 hours, so for now, leave it as "1 days".

We're going to start a program, so choose the "Start a program" option for the Action section.
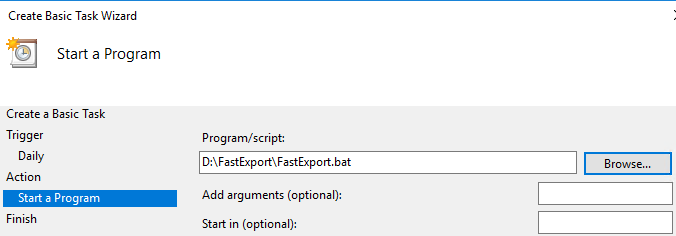
Navigate to your "FastExport.bat" file with the "Browse.." button, and then hit OK, and it should auto-populate with the full file path.
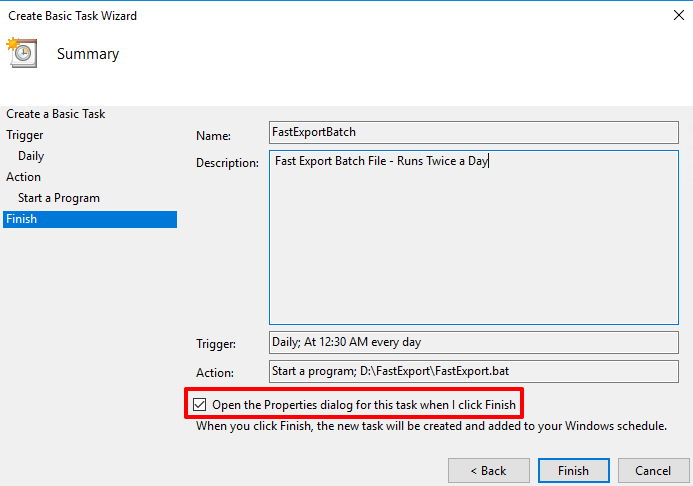
The last screen is a "Summary" screen. Make sure you check the "Open the Properties dialog" option, so when you hit "Finish", it opens the scheduled task's advanced options.
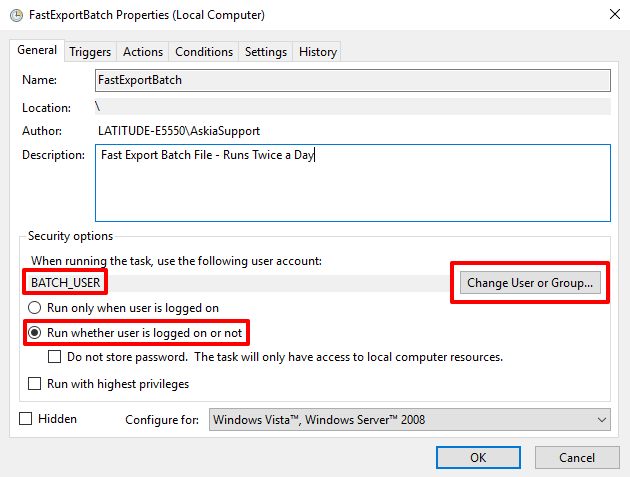
Next, I want to choose the "Run whether user is logged on or not", and then make sure my scheduled task is set to run as my new "BATCH_USER" account, which has the "Log on as a batch job" rights that we set up in Step #3.
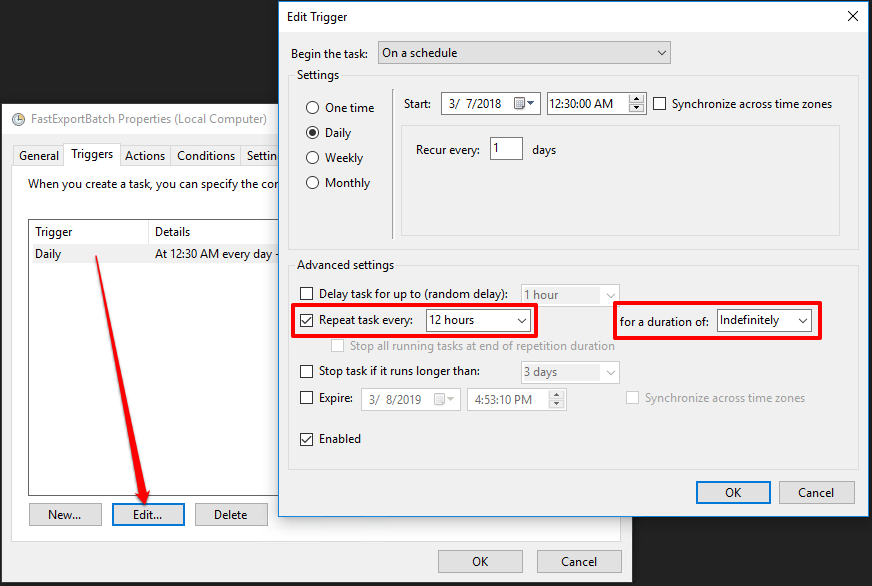
Now we want to go into the advanced "Trigger" options and make sure our trigger is set to run every 12 hours, indefinitely.
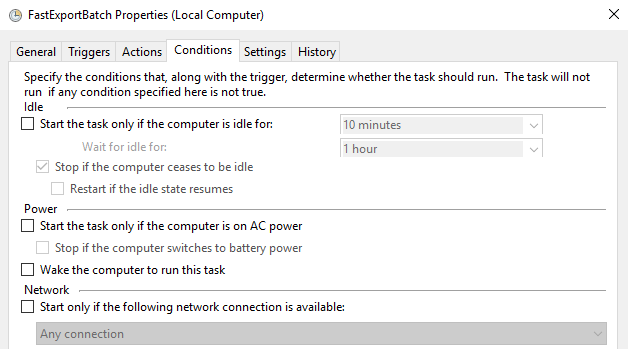
Go to the "Conditions" tab and uncheck all of the options. We want this task to run all the time, regardless of condition.
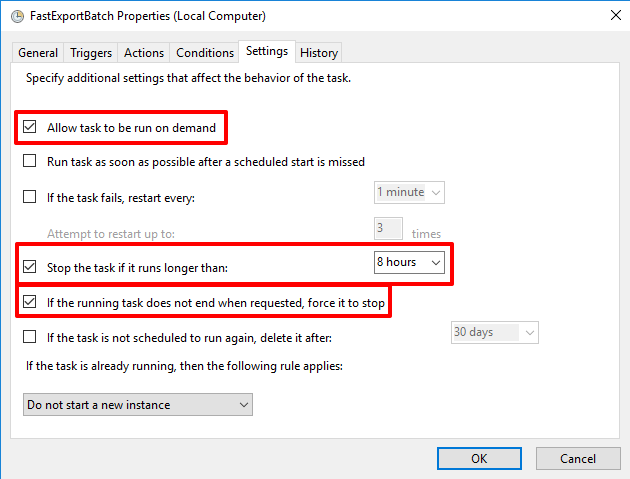
Now we want to go to the "Settings" tab and enable the highlighted options.
Note: these options are up to your discretion. Most Delimited ASCII exports completed using command line options from AskiaTools won't take more than 8 hours to finish; this option makes sure there will be no existing "FastExportBatch" Task still running when the next Task is scheduled to start.
Step 8 (optional)
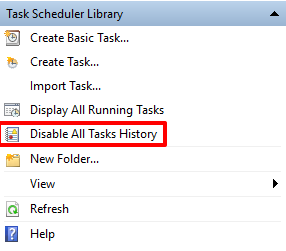
From a troubleshooting perspective, I prefer to have the Task Scheduler history enabled. By default, this is turned off. To enable it, you need to go into the main Task Scheduler screen, on the right, and click the option that says "Enable All Task History" (mine says Disable right now because I already have it enabled):
Phew! THAT'S IT! You're done!
Validation
As the current time is most likely not "12:30:00 AM or PM", in order to test if this is working, you'll want to manually start the scheduled task.
You can do this by right-clicking on the name of the scheduled task (in my case "FastExportBatch") and choosing the "Run" option.
If everything worked as expected, you should see an "AskiaToolsU.exe" or "Tools.exe" process start executing in the Windows Task Manager. Once it closes, you should see your new QES and exported Delimited ASCII file(s) in the export directory:
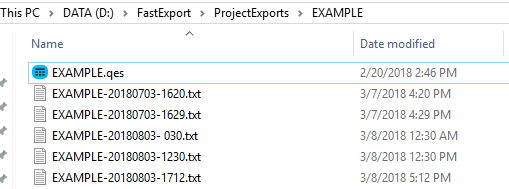
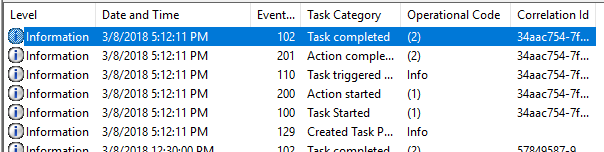
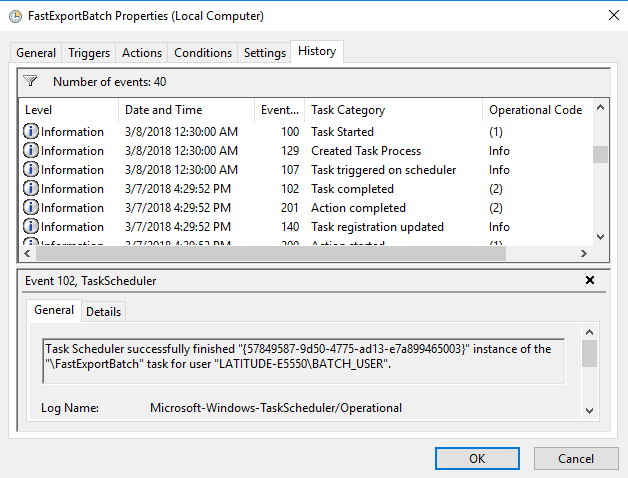
I can also see in the History of the Scheduled Task that it started and completed successfully.
I can match these times up with the times located on the created Delimited ASCII file(s):


Additional Closing Thoughts
- If you have multiple servers running Askia software (CCA / WEB / VISTA / SQL / etc.), it's preferred you run the batch files from either a separate server or directly on the CCA server. This is to prevent your exports from causing unnecessary load on the important systems.
- The example demonstrated in this article will create a new exported Delimited ASCII file every 12 hours for each specified project. This means you will need to manually go into your export directory for each project and delete/archive/clean-up any old, no-longer-needed exports. Depending on the size of your exports, and the amount of available space in your "DATA" partition/drive, you may need to do this often, or not often at all. Your mileage may vary. This is your responsibility.